Custom Li-ion Battery - Making and Buying
APR 01, 2020 Pageview:909
Lithium-ion batteries are an excellent battery technology that produces high energy densities required for powering the technological and industrial era of our generation. As such, it is no longer necessary to always buy new and already pre-designed cells from stores, as was the tradition. Now it is possible to make your own or order a customized pack as explained below.
Can you make your own Li-ion battery pack?
Yes, it is possible to make your own lithium-ion battery pack from scratch using a few materials. However, the process is considered dangerous because one would not be following the recommended safety guidelines or procedures inflicted on manufacturers and should, therefore, be done very carefully.
How do you make your own lithium-ion battery pack?
Step 1. Battery Protection
For battery protection and management, manufacturers install a small device system known as Protection Circuit Board. These tend to come in a variety of types depending on the number of cells you would be dealing with, their voltages and capacity. The function of the PCB is to ensure that the battery does not overcharge since the compounds within the cells are extremely reactive, and when overcharged, it can damage the entire battery. However, If this scenario were to occur, the job of the PCB would be to cut off power t the affected cells
Modern charging devices have technically smart chargers that cut off power to the cells once the cells have a full charge. Also, many rechargeable batteries can be discharged below the discharge point, which is a zero. However, when it comes to lithium-ion batteries, you cannot discharge the voltage below its peak. Lithium-ion batteries usually have a voltage point of about 2V, and discharging below this can damage the cells. The PCB also comes in such a discharge instance to prevent the battery from being discharged below this voltage point by shutting it down.
The PCB also protects the battery against shorts in case wires got disconnected or crossed each other’s path.
Step 2. Get the cells
Your next step would be to acquire the lithium-ion cells. There is usually a difference between a battery and cells that people keep confusing and using interchangeably. A cell is typically the most indivisible part of the battery that stores power while the battery is made up of more than one cell.
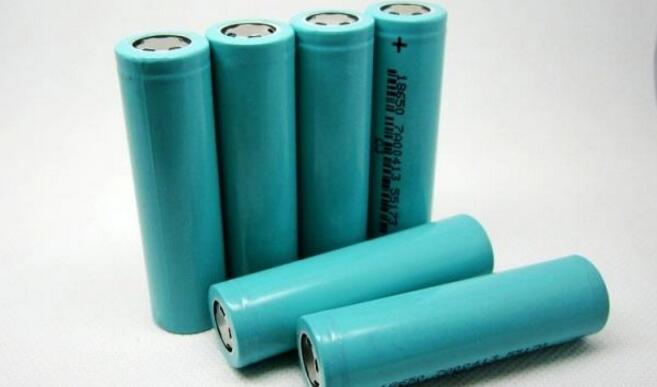
It is always advisable to use 18650 cells for this procedure because they are quite easier to acquire and manage as compared to other lithium-ion types. Each cell measures about 18mm by 65mm. You can use old batteries as this would cut down on your expenditure or buy used ones on eBay.
Step 3. Acquire some battery holders
Normally, whenever you buy an entirely new battery pack, you would notice that it is wrapped in shrink wrap while the cells tend to be spot welded together. Doing this makes them smaller and lighter for the manufacturers to package, but they are, however, unserviceable in that state.
Therefore, you should get yourself a set of battery holders as this allows you to remove any cell whenever it malfunctions easily. Using the pack in its original out-of-the-box state can be dangerous as if you intended to extract one failing cell, you might end up interrupting the welded point and destroying the entire formation.
Step 4. Experiment box
When experimenting, it is always recommended that you do it in a container or box that would keep the batteries from shaking. The batteries are typically held by springs alone, and this isn’t enough because the wires used in the experiment could shake out of the designated terminal blocks. So ensure you fix them firmly. Place the set-up in a project box and connect the terminal block to it. You can use any kind of insulation between the batteries to prevent shorts.
Step 5. Connecting the wires
Wiring is a crucial part of the experiment, and as much as you cannot get electrocuted with the small voltages used when you mess up the wiring, you can always get a burn instead. This isn’t a pleasant experience, and thus, you should ensure that you use a suitable wiring style to connect everything. It is recommended that you use the European Style terminal Blocks.
Don’t use any permanent connection methods but, instead, make use of screw-type terminals. This is because you would want to reconnect a wire differently in case you put it in the wrong terminal and using and the screw-type connection greatly promotes the trial and error set-up.
Step 6. Charging the cells
If you are using old or used lithium-ion batteries, you would have to charge them first before completing the experiment for the battery pack to function efficiently. The most suitable charging method is using balance charging. You can either apply about 4.2V to the individual cells or 16.8V to the entire battery pack using a balance charger.
Balancing the cells prolongs their lifespan because the used or old batteries are in various deteriorated states. Balancing will ensure that the voltage is the same for every cell in the entire battery pack.
Step 7. Activate the Protection Circuit Board
It is possible to wire everything correctly with the batteries sufficiently charged but end up finding out that the PCB isn’t functioning. This situation, therefore, requires you to activate the PCB by applying about 16.8V to the P+ and P- terminals. While the PCB is designed to be charged, you would, however, need to trick it into thinking that it’s being charged through its terminals, and that should get it to jump into life.
You should also note that the PCB shuts down the entire circuit whenever it detects a short caused by crossed wired or a disconnected one. Therefore, whenever any of the two instances occur, you would have to trick the PCB again by applying a voltage to its terminals to activate it because it completely shut down.
Step 8. Charging the pack
It is recommended that you avoid charging the battery above 1C because doing so could wear the battery out, causing it to catch fire. Furthermore, the maximum continuous current that can be drawn from the battery is something around 12amps derived from the ratings of one 18650 cell, which is usually 1.5C. It is also advisable to use small wires that are capable of handling the current.
Step 9. Balancing the pack
Do not confuse this step with balance charging, as most people would do. It is always advisable to swap two cells with the highest voltage with those of the lowest voltage in the p ack. You can even replace the lowest voltage cells with others.
Step 10. Precaution
You should only experiment when you have a good idea of what you’re doing. When testing the battery out, charging or discharging, be sure to do so in the sand as a precautionary measure against any hazards that may arise.
Where can you buy custom Li-ion batteries?
There are many different types of lithium-ion batteries available in the market, and n specific one is suitable for all applications. There are a few industries or companies that specialize in the battery supplier chain as well as quality and, therefore, can offer you the most favorable cells depending on the performance and price. These industries design and produce some of the best power solutions that are aimed at satisfying your needs.
Final thoughts
We no longer live in an age where we can only settle for the manufacturers’ options. You can now make your own pack from the comfort of your home or even have one manufactured according to t your own specifications. Batteries are increasingly growing into more of user-specific and less of the device-specific.
- Prev Article: 18650 Battery and Charger-Charging and Making
- Next Article: Lithium Ion Battery Charging First Time-When and How
Leave Message
Hottest Categories
-
Hottest Industry News
-
Latest Industry News


